> ## Documentation Index
> Fetch the complete documentation index at: https://www.klavis.ai/docs/llms.txt
> Use this file to discover all available pages before exploring further.
# Setting Up Monday.com OAuth App
> Complete guide to creating and configuring a Monday.com OAuth application
## Prerequisites
* Monday.com account (admin access recommended)
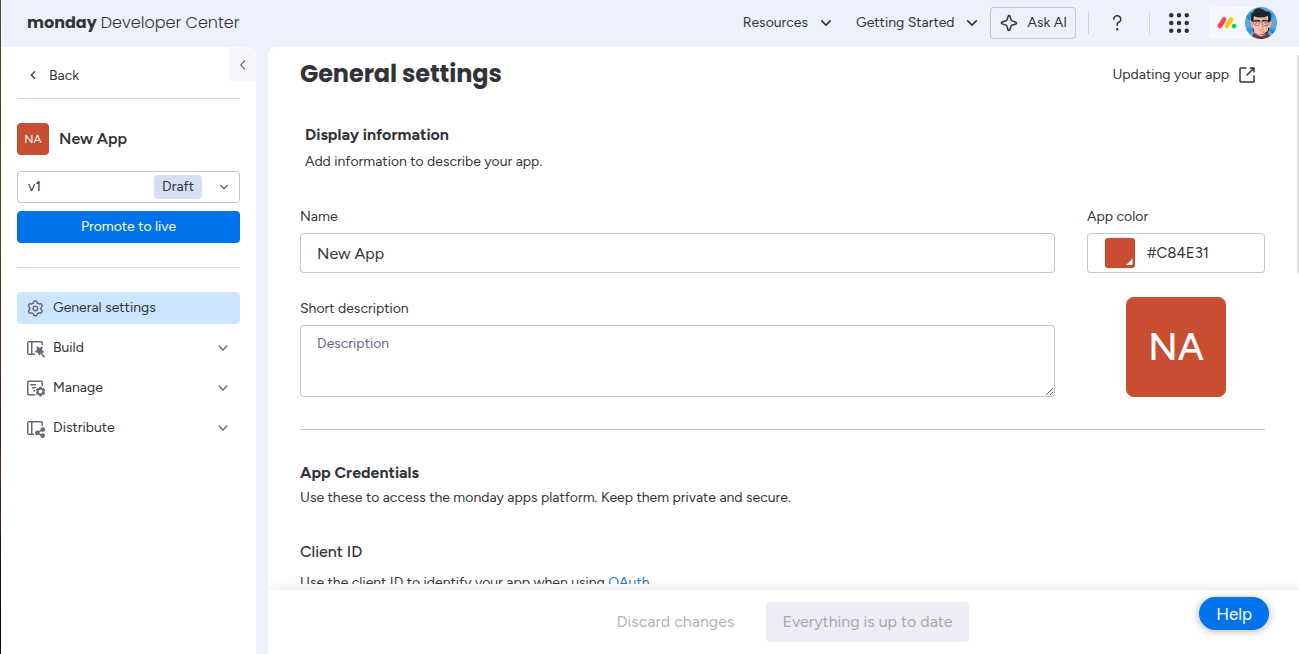
## Step 1: Create a Monday App & Get Credentials
1. Log in to [Monday.com](https://monday.com)
2. Click your **avatar (top-right)** → **Developers**
3. In the Developer Console, click **Create App**
4. Once the app is created, you can immediately see the **Client ID** and **Client Secret**
5. Copy both and keep them safe
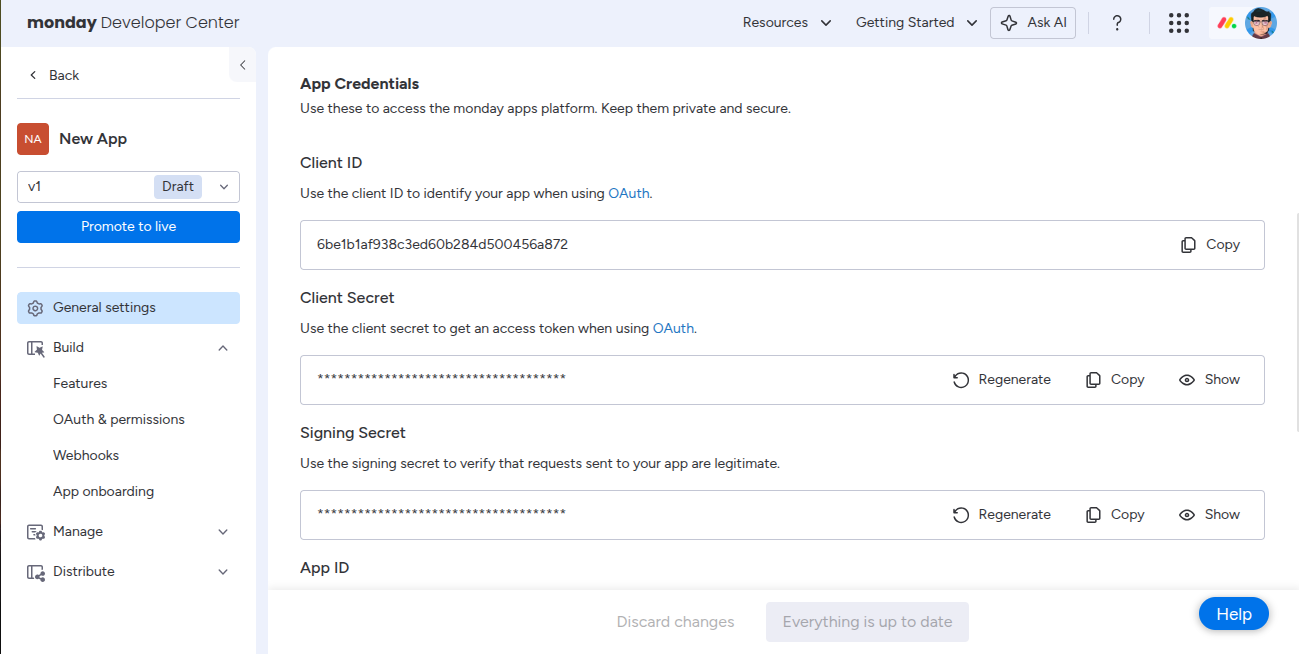 You now have your Monday.com **Client ID** and **Client Secret** ready for integration with Klavis AI.
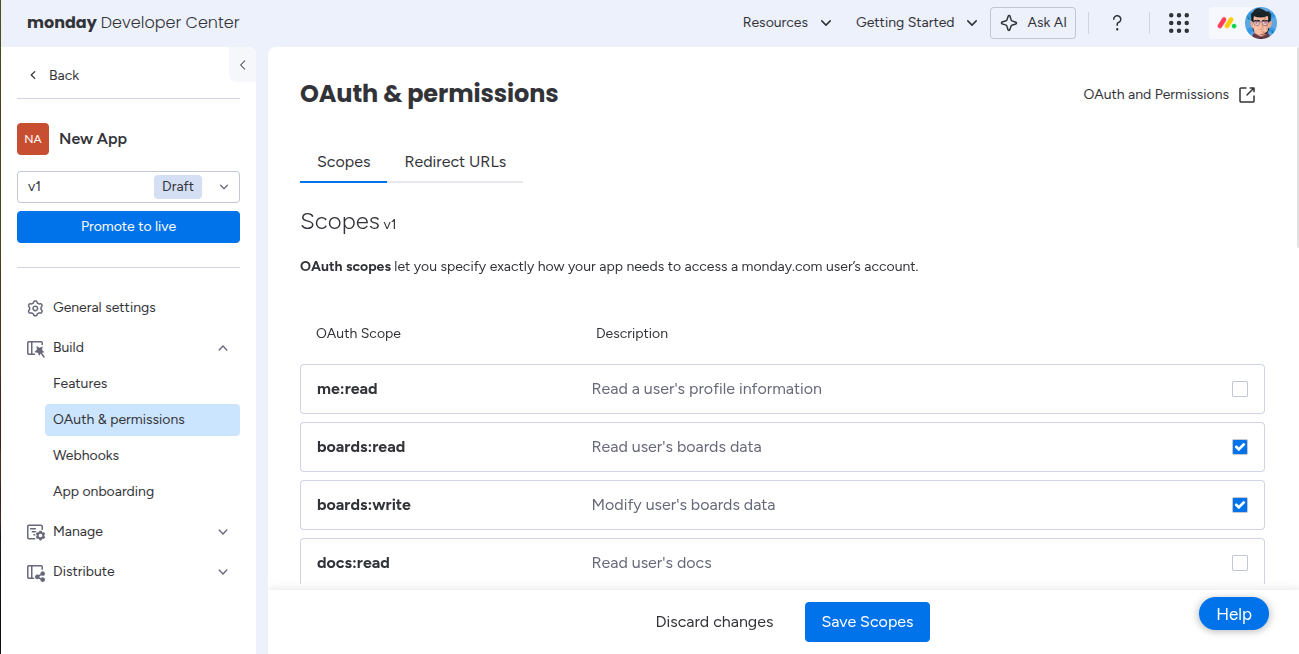
## Step 2: Configure OAuth & Permissions
Klavis Monday MCP Server typically uses:
`users:read, boards:read, boards:write, updates:write`
1. Open your app → go to **OAuth & Permissions**
2. Under **Scopes**, select the permissions your app requires.
You now have your Monday.com **Client ID** and **Client Secret** ready for integration with Klavis AI.
## Step 2: Configure OAuth & Permissions
Klavis Monday MCP Server typically uses:
`users:read, boards:read, boards:write, updates:write`
1. Open your app → go to **OAuth & Permissions**
2. Under **Scopes**, select the permissions your app requires.
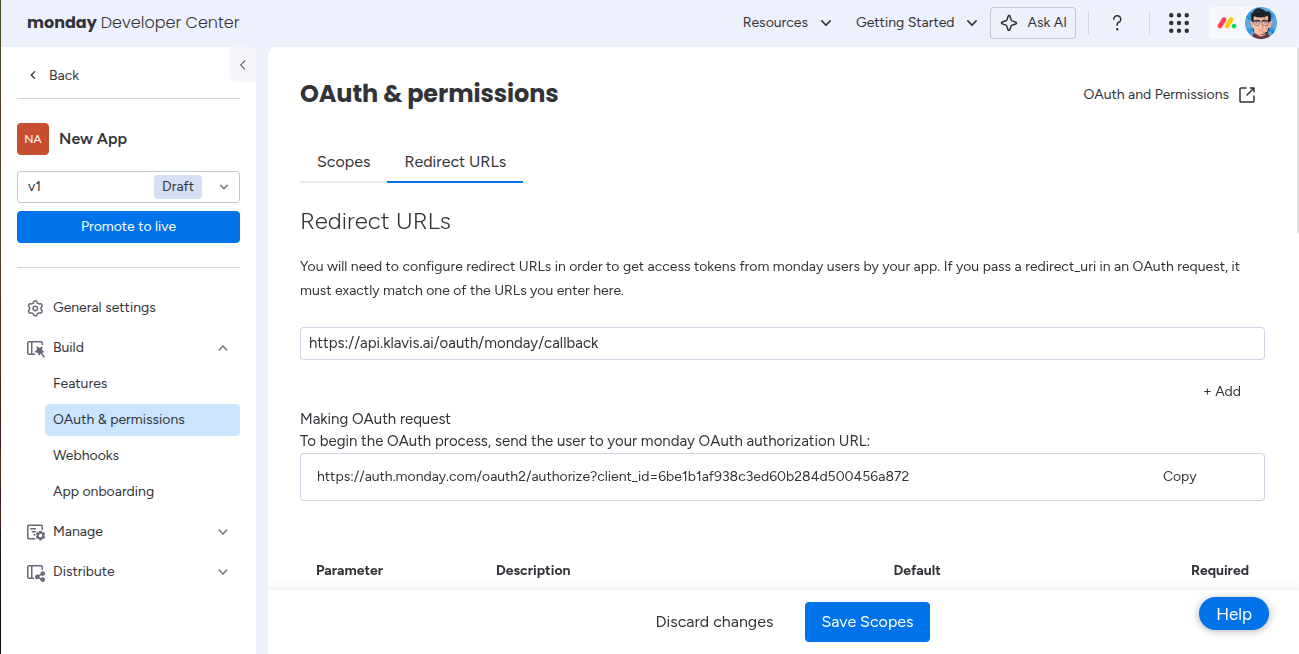
 3. Under **Redirect URLs**, add:
```
https://api.klavis.ai/oauth/monday/callback
```
3. Under **Redirect URLs**, add:
```
https://api.klavis.ai/oauth/monday/callback
```
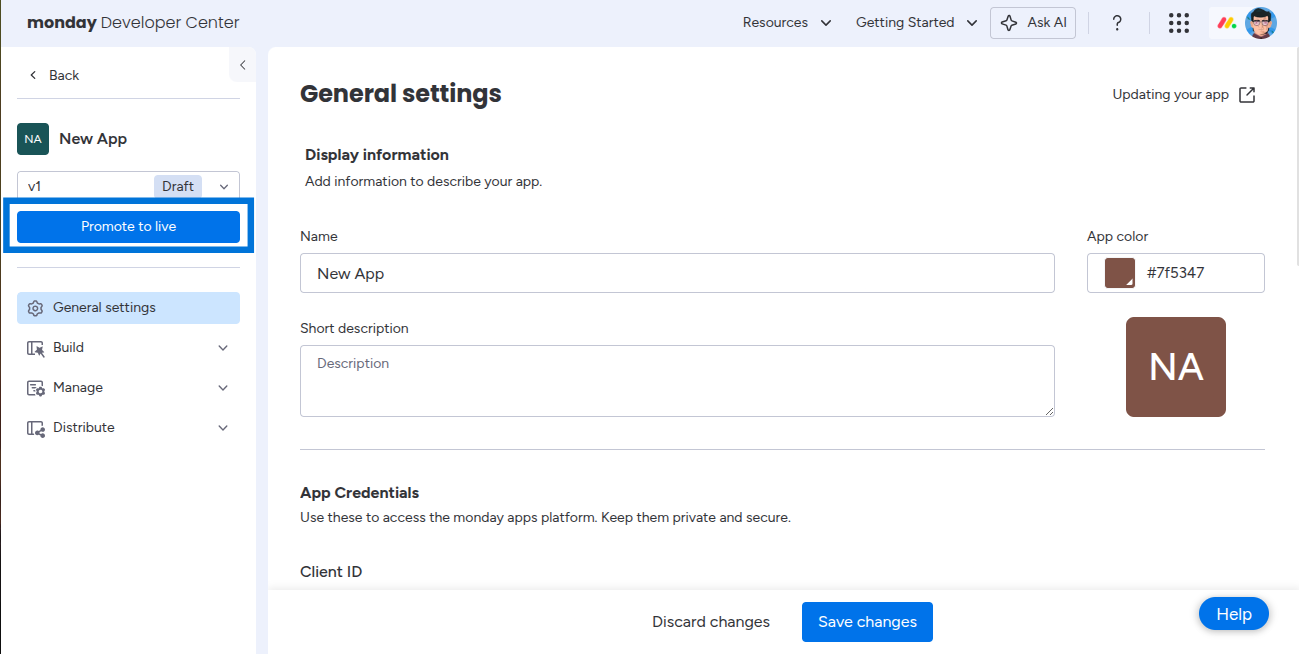
 ## Step 3: Promote to Live
1. Once everything is set up, click **Promote to Live**.
Your app will now have permanent credentials and can be used in production
## Step 3: Promote to Live
1. Once everything is set up, click **Promote to Live**.
Your app will now have permanent credentials and can be used in production
 You have successfully created Monday.com OAuth application! You now have your Client ID and Client Secret ready for integration with Klavis AI.
## (Optional) Step 4: White Labeling
White labeling lets you use your own Monday.com OAuth app branding instead of Klavis AI’s default.
To use your own OAuth app:
1. Go to [Klavis White Label Dashboard](https://www.klavis.ai/home/white-label)
2. Enter your **Monday Client ID** and **Client Secret** from Step 1
3. Confirm the redirect URI:
```
https://api.klavis.ai/oauth/monday/callback
```
4. Start the OAuth flow with your client ID:
```javascript theme={null}
const authUrl = `https://api.klavis.ai/oauth/monday/authorize?instance_id=${instanceId}&client_id=${yourClientId}`;
```
For detailed examples, see our [OAuth & White Labeling guide](/docs/auth/white-label).
## Resources
* [Monday.com Docs](https://developer.monday.com/apps)
* [Klavis OAuth & White Labeling Guide](/docs/auth/white-label)
* [Klavis White Label Dashboard](https://www.klavis.ai/home/white-label)
You have successfully created Monday.com OAuth application! You now have your Client ID and Client Secret ready for integration with Klavis AI.
## (Optional) Step 4: White Labeling
White labeling lets you use your own Monday.com OAuth app branding instead of Klavis AI’s default.
To use your own OAuth app:
1. Go to [Klavis White Label Dashboard](https://www.klavis.ai/home/white-label)
2. Enter your **Monday Client ID** and **Client Secret** from Step 1
3. Confirm the redirect URI:
```
https://api.klavis.ai/oauth/monday/callback
```
4. Start the OAuth flow with your client ID:
```javascript theme={null}
const authUrl = `https://api.klavis.ai/oauth/monday/authorize?instance_id=${instanceId}&client_id=${yourClientId}`;
```
For detailed examples, see our [OAuth & White Labeling guide](/docs/auth/white-label).
## Resources
* [Monday.com Docs](https://developer.monday.com/apps)
* [Klavis OAuth & White Labeling Guide](/docs/auth/white-label)
* [Klavis White Label Dashboard](https://www.klavis.ai/home/white-label)